Tuesday, April 16, 2024

Happy Graduation! Handmade Card Ideas to Celebrate Your Grad! {New from Impression Obsession}

Graduation season is almost upon us and it's so special to honor the grads in our life with handmade cards and gifts. It's a season filled with nostalgia and celebration and maybe a teensy bit of stress as we help our graduates cross the finish line. Make your graduates a card, gift card holder, or party decor that's customized just for them, using their school colors. They'll love the extra thought and time you put in to celebrate their accomplishments. Today I'll share some simple ideas you can start with, to knock out your graduation cards in no time!

This blog post contains affiliate links. When you purchase through my links, I receive compensation at no cost to you. Thank you from the bottom of my crafty heart!

All of today's cards begin with the adorable graduation cap die set, so let's start there. This new die set from Impression Obsession includes the pieces to make two caps, one slightly larger than the other. Each cap only has three pieces, so it's quite simple to assemble. You can mix and match with colors - I even used some glittered cardstock for added sparkle!

The striped cards below are a great way to bring school colors into the design. Cut strips into assorted heights, and then layer them together onto a card base. I made both of these cards at the same time, so it was quick and easy. Plus, since I die cut the graduation caps at the same time, I had everything I needed all at once. A die cut landing spot, and a simple stamped sentiment finished off these cards in no time!
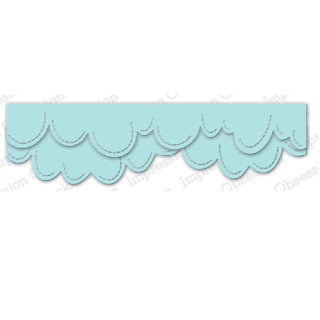
Lastly, a few die cut clouds and graduation caps were all I needed to assemble this festive grad card. Remember, graduation caps don't have to be black! It's another fun way to personalize your card especially for your graduate. 
Today is Day 2 of the Impression Obsession designers blog hop. We're celebrating all the great new stamps, dies, paper, and stencils in the April release. I hope you'll stop and see what all of my crafty peeps have created!
Don't Miss These Important Details:

  • Two lucky customers who place an order between April 15-22 will receive a special Impression Obsession prize package added to their order! Will it be YOU?
  • Have you been to the IO website lately? Check out the entire NEW PRODUCTS section, plus Featured Sale section with outdoor and summer themed stamps and dies 25% off
Catch Every Stop on the Blog Hop!
Laura Williams (you are here!)

Shop the Supplies on Today's Cards


Pin it for later!


Monday, April 15, 2024

Sweet As Honey! These Stamps are BEE-Utiful! {New from Impression Obsession}

Hey honey! Just wanted to buzzz by to share the Sweet As Honey stamp set from Impression Obsession. It's part of the latest release at IO and we're celebrating with a blog hop to share all the new sweets. Plus, I have a simple stencil layering idea that you can try TODAY using stencils in your stash.

This blog post contains affiliate links. When you purchase through my links, I receive compensation at no cost to you. Thank you from the bottom of my crafty heart!
The Sweet as Honey stamp set is the cornerstone of some new products that work perfectly together. The stamp set has a variety of SWEET little images including bees, honey, honeycomb and sentiments for a variety of cards. You'll love pairing it with the Honeycomb stencil, as well as the brand new coordinating 6x6 paper pack. (I didn't have the paper yet when I created these cards, but the Yellows Basics 6x6 pad is a another perfect pairing with this set!) 

So let's talk about stencil layering. This is the technique I used to add the circle-shaped honeycomb pattern on the card above. 

Try this stencil layering technique:
  • Choose a patterned stencil (like today's honeycomb) 
  • Choose one of the following: either a stencil with a large open shape (like the new circle stencil I used) or die cut a large shape from cardstock and use the negative piece as a homemade stencil. 
  • Layer one stencil on top of the other and ink over them together onto your card. (Use washi tape to help your layers stay in place if desired)
The stenciled circle shape creates a simple focal point and fun landing spot for the stamped and die cut elements to settle.  Speaking of landing spots. . . .did you catch the adorable new scalloped circle die I used on my second card? This set includes three scalloped circles that you'll use again and again, and their smaller size is perfect for sentiments and tags. (Or as a landing spot for bees and honey!)
Remember, we're celebrating this SWEET release with a two-day blog hop (this is day one!) I know you'll enjoy what the other designers are sharing this week! 
Don't Miss These Important Details:

  • Two lucky customers who place an order between April 15-22 will receive a special Impression Obsession prize package added to their order! Will it be YOU?
  • Have you been to the IO website lately? Check out the entire NEW PRODUCTS section, plus Featured Sale section with outdoor and summer themed stamps and dies 25% off
Catch Every Stop on the Blog Hop!
Laura Williams (you are here!)
Shop the Supplies on Today's Cards

 Pin it for later!


Six Simple Thank You Cards With Patterned Background Dies {Spellbinders Paper Arts}

Card-sized background dies are a powerhouse craft supply to have in your paper crafting stash. Today I'll show you SIX different ways to make a thank you card with just a background die and a simple sentiment. (Plus, maybe just a circle die or two.) Think about how you can use the background dies and simple sentiments already in your stash, to make these ideas your own!

This blog post contains affiliate links. When you shop through my links I receive compensation at no cost to you. Thank you from the bottom of my crafty heart!

Monochromatic Background With a POP of Shine:

First, let's start with a simple monochromatic look. Die cut the Super Stripes background from dark pink, and layer it onto a light pink background. For maximum dimension and shine on your sentiment, die cut it from multiple layers of cardstock (or a layer of black foam) and add dimensional glaze on top. 

Negative Space Stripes:

Next, die cut the background from multiple colors and just use the negative pieces as stripes. Here's a tip: To make it simple, lay the outer piece on top of the cardstock panel like a template, (with a little piece of washi) and glue the pieces into the open spots. Then, lift the outer piece and you've got perfectly placed stripes.  If your sentiment looks like it'll get lost on a busy background, add some die-cut vellum to showcase your focal point.

Negative Space Sentiment:

Remember that shiny thank you on today's first card? I cut it from black foam - and then used the negative leftover piece to make this large circle. Think about how you can use the negative space left from your sentiment dies!

Background Stripes:

Next, let's look at three ways to use the Pennant Background Die. The first card uses the outline of the die, with strips of cardstock behind it for a striped effect.

Negative Space Pennants:

Remember my tip for the Negative Space Stripes card above? Here's the same technique with the pennant die. Use the outer piece as a template, and glue the pieces inside like you're doing a puzzle. Then, lift the outer piece out for perfectly placed triangles. 

Shaker Card:

And last but NOT least...a shaker card! Add a sheet of acetate behind the die cut panel, pop it up on foam adhesive and add some sequins for a super festive thank you card.

Do you have background dies in your collection that would work with these ideas? Try them out and make these card ideas your own! And if you want to grab any of these goodies - catch them now during the Spellbinders Spring Cleaning Warehouse Sale at great prices! 
Shop the Supplies on Today's Cards

The thank you die I used is out of stock, but here's a similar die set with awesome sentiment dies that I've used on many other cards. (Plus, it's on sale!)
Simply Perfect Mix & Match Sentiment Dies

Pin it for later!

Looking for more great Spellbinders inspiration? 
You might love this post too:

Saturday, April 13, 2024

Celebrate Summertime in the Great Outdoors With These Handmade Card Ideas

Whether you'd rather head to the beach, the woods, the lake, or drive cross country, I've got a card for your travels. Let's go on a summer adventure together, with cards to celebrate our favorite getaways. And the best part? All of these cards feature stamps and dies that are part of this week's Featured Sale category at Impression Obsession. Ready to jump in?

First up, let's head to the beach:

This cute mini-slimline (6x3.5-inches) is a fun size to create with, and it was the perfect shape for my beach beauties to relax on their private beach. Torn paper, and watercolor add fun color and texture to this summery card featuring the Beach Fun stamp set. (Grab it today for 25% off!)

Next, let's leave the beach and jump into the water:

Take Me to the Sea (also 25% off) is an adorable stamp set with an array of sea creatures and fish. Make your own underwater scene, or create a fun collage of critters like this card. Here's a tip: whether you cut out your images or stamp them directly to your circle, fill in any awkward spaces with gems or embellishments to finish off the space. (Find more details about this card here.)

Our next adventure takes us to . . . wherever Bigfoot lives!

Like the sentiment says, let the adventure begin! This adorable Bigfoot is from the Camping with Bigfoot stamp set. (You guessed it. . .also 25% off right now.) In addition that awesome campfire die set is part of the sale as well. Want to know how I created those soft puffy clouds? 
 Find the scoop, as well as some cute s'mores cards on this blog post.)  

And lastly, wherever the road takes you KEEP GOING!
Head to the beach, the mountains, the rivers or forests in your Jeep! This 25% off die set is called Off Road and the circle format is really cool for your projects, especially for more masculine cards. (Find more ideas with this die set and stamps here.)

I hope you've enjoyed our vacation travels! Be sure to head on over to the Impression Obsession store to grab any of these summer-fun stamps and dies! (And see the Featured Sale Category to see what's on sale each week!)

Shop the Supplies on Today's Cards: